home: http://taps.cs.princeton.edu 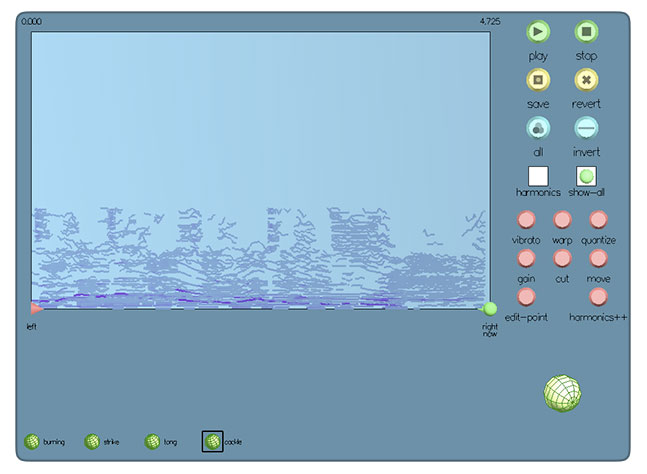
Figure 1 : Group interface full-shot Getting started The group face is where to go when you want finer-grained control over the tracks in a deterministic (sinusoidal) template. This face allows you to:
To get started, first load some sound templates from the analysis face. They will appear on the group face once the templates have been added to the library. Adding and removing tracks (combining templates) The easiest operation on this face is to add and remove tracks from a template. Actually, you don't edit the original template exactly; you save a new copy of the template with only the tracks you want. You can select or deselect tracks by clicking on them. Only selected tracks will be affected by editing operations. So to save a copy of a template with some tracks removed, deselect them and click save. To add tracks to a template, select template you want to add the tracks to, then also select the template whose tracks you wish to add. All the tracks from all selected templates will be displayed together. Deselect the tracks that you do not need by clicking on them, then click save. Newly-saved templates will be available on the other faces (like the synthesis face). Mistake and exploration management (undo) Undo states are created whenever you change editing controls, not after making individual edits. This way you can, for example, tweak the vibrato controls to perfection without running out of history space to go back further in case you need it. To apply an effect multiple times with different parameters, click the control's button after the first effect is applied (commit the change), then again to open the controls again. Harmonic selection Harmonic sounds are those for which most of the tracks are integer multiples of a common frequency. Examples are sounds made by many musical instruments, voice, and Wile E. Coyote falling from a cliff. 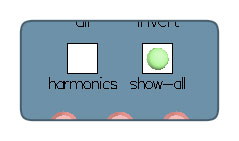
Figure 2 : Harmonics selection toggle (left) and "show all tracks" toggle (right). To make working with harmonic sounds easier, there is a toggle button labeled harmonics. When checked, all selection/deselection commands are applied also to tracks which appear to be integer multiples of the selected track, i.e. the harmonics of that track. The decision of which tracks are multiples of the selected track is made by examining the frequencies of all tracks at the time position which is clicked. Tracks which are inharmonic at that time will not be selected even if they become harmonic later on. To make selection more or less lenient in which tracks are considered harmonic, use the slider of the harmonics++ tool. Show all! The show-all toggle button toggles display of deselected tracks. When checked, deselected tracks are not shown at all and the track box display zooms in on the tracks which are still visible. Warp and vibrato 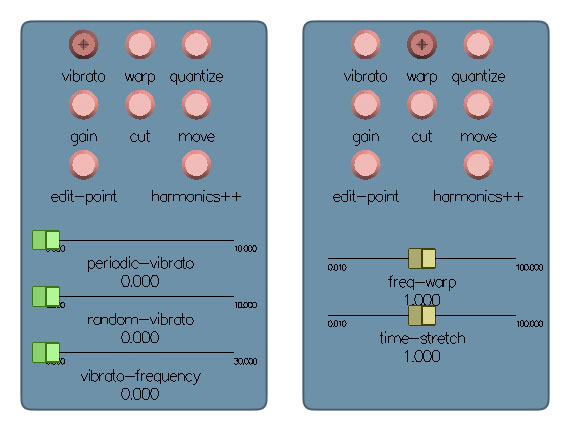
Figure 3 : Controls for the vibrato (left) and warp (right) controls, accessible by clicking their respective buttons. When first opened, a control's sliders are in positions which effect no change. 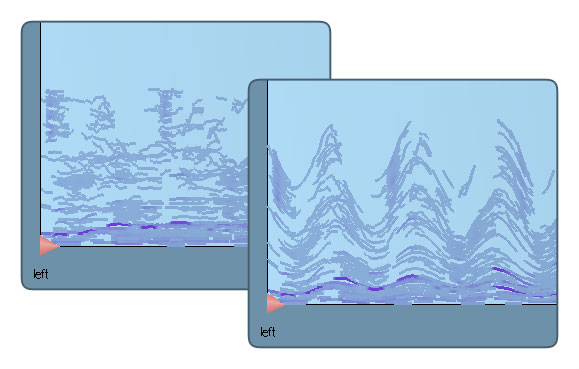
Figure 4 : Vibrato effect, before and after. Frequency/time-warp and vibrato effects are controlled via sliders which are visible when either of these controls are selected. There are three vibrato sliders. periodic vibrato adjusts the amplitude of the vibrato applied. random vibrato is the amplitude of the random vibrato (random frequency warping). vibrato-frequency is the frequency of sinusoidal vibrato applied. The sliders for warp are very simplistic: the freq-warp slider is for selecting a value by which the frequencies should should be scaled (multiplied). The time-stretch slider selects the scale factor for the length of selected tracks. Pitch quantization The quantize tool has a single button which applies pitch quantization when pressed. The quantization is to frequencies represented by integral MIDI note values (i.e. a chromatic scale). Gain painting The gain tool allows you to adjust gain by "painting" the tracks with your cursor. The gain amount slider selects the factor by which the gain of tracks near the cursor will be scaled. Cut The cut tool is for splitting individual tracks into two pieces, before and after the cut cursor. This is useful for when you want to apply a transformation to one part of a track but not the other. There are two modes for this tool: single track and line. In single track mode, click the point on a track at which to cut. In line mode, click at the point along the time axis at which you want all selected tracks to be cut. Move Similarly, the move command has two modes: frequency and time. Drag the mouse through the track box to translate (not scale) the selected tracks along the axis you select, frequency or time. The results sound weird in frequency mode with harmonic sounds, of course. Edit point The edit point command lets you move individual time/frequency points of a track with the mouse. Just click and drag. Additional keyboard controls There are a few hotkeys specific to the group face:
  space : begin playback
      a : select all tracks
      i : invert selection
|
taps | soundlab | cs | music